Total Pageviews

About Me

My photo
Stay at home mom with dreams of perfecting all things mama.

Tuesday, August 13, 2013

Free and Easy

I found free furniture. I had a thought. It turned into a cute birthday prop for my little girl's birthday!

My kids were able to watch me transform something old into something new. Sounds like what Jesus does for us!

Here is what I got for free:


Here is what I did to it:


I turned it into a lemonade stand for my daughter's lemonade themed birthday party!

1.) I painted the furniture with some yellow paint we had left over in the garage. I didn't take time to make the paint job perfect because I kind of wanted to give it a vintage look.

2.) I looked through my craft supplies and made some cute banners from burlap and scrap material. Then I used some decorations from my house to decorate a little more.

3.) The chalkboard is a toy I got for my kids last summer for $3 at a garage sale. I used it to write a quote to go along with the stand.

Easy peasy lemon squeezy...hahah

Take Ten!


Monday, August 5, 2013

Don't trash it, re-purpose it.

We had a wedding to go to and we also have a strict budget to adhere to...how do we go to a wedding, take a nice gift, and not break the bank? This is where one must get creative.

I recently have become more interested in re-purposing items I find at yard sales, Goodwill, etc. And burlap for decorating is becoming really popular so I like to use it in projects too. I combined an estate sale item with a little paint and burlap to create a nice wedding gift for only $4.50 out of pocket.

Here is what I did, and yes the kids can help too! (With a little guidance of course.)

1.) I bought this frame for $2.00 at an estate sale.

.

2.) I took out the backing, the print, and the glass and laid the frame on top of a cardboard box in the yard. Then, I spray painted it an almond/cream color. It covered up the blemishes and gave it a fresh, new look.

3.) I used about half a yard of burlap to wrap around the cardboard backing that was in the frame and hot glued it down. Then I taped it to the back also to ensure it stayed in place.

4.) Next, I stenciled in Mr. and Mrs. Est 2013 onto the burlap using permanent marker.

5.) Finally I placed it back into the frame with the glass over the top.

6.) Here it is! At first I only had Mr. and Mrs. on there, but later added the Est. 2013.


7.) This cost me an estimated $4.50--Frame: $2 Burlap $1.50 and part of a can of spray paint $1.00.

Take Ten to re-purpose something!

Wednesday, July 24, 2013

paint your walk

The other day we did something out of the ordinary. We make sidewalk paint.


Easy recipe: Equal parts cornstarch and water mixed together. Add food coloring and glitter.


I didn't measure, I just eyeballed the amount of cornstarch and water, so it came out a little watery. It still worked and it was still fun!


And it is completely washable.

Take Ten!

Wednesday, July 3, 2013

fourth fun!

This project was found on Pinterest and it is so easy and fun!
Fireworks in a jar:
Jar
oil
water
food coloring

Fill jar with water. Fill lid with 3 tablespoons oil (I used olive). Put in different drops of food coloring and mix. Drop it all in the water and watch the show.

That's it!


Take Ten!

Wednesday, May 29, 2013

Learning with garlic

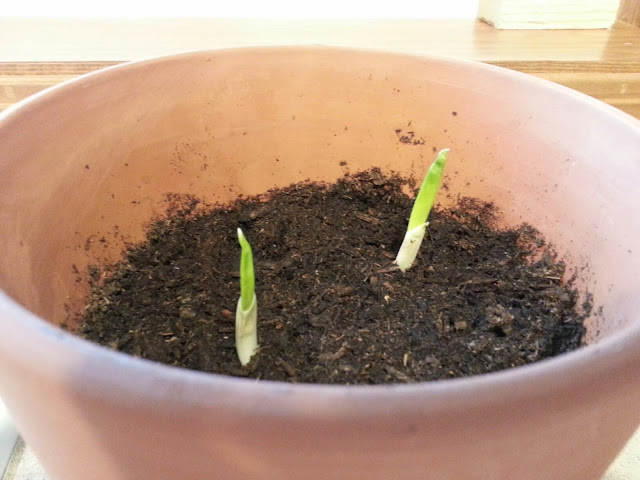
Did you know you can plant garlic cloves and they will grow? I just learned this recently, so the kids and I tried it!

 We buried them on Wednesday and this is what they looked like by Saturday!

Every morning the kids ask to see the garlic and every time they look at it and say "woah!" in unison. It is so cute.

Holding a plant while taking pictures results in blurriness...
These pictures were taken yesterday..can you see how much taller the garlic is from just Saturday to Tuesday?


It will take a while to be able to harvest but I think it will be well worth our efforts. I love cooking with garlic!

Take Ten!
Watch something grow.

Monday, May 20, 2013

Slacking

I've been slacking on taking tens with my kids lately. Not just regular old take tens, but planned, thought out, take tens. So today I made a schedule and made myself stick to it.


Yes I wrote it on a magna doodle because it's kid friendly! ...but I also took a picture of it in case someone erased it. I showed the kids the schedule when they woke up and they were excited for it! They kept asking "what's next?" after we would finish something.

Everything on the list went smoothly except for math.

I made math worksheets and I should have foreseen the problem. I should have known the kids would get frustrated trying to do a math problem while their mom was in the shower unable to help. But I still like the schedule idea. I can see this helping for a homeschooling future.

Take Ten! Make a schedule :)

Thursday, May 16, 2013

Pinterest math

I got this idea from Pinterest and my kids LOVED it!

1.) Get a piece of blank paper.
2.) Fold it so that when it is unfolded there are eight little squares from the fold marks.
3.) In each square write an addition problem.
4.) Show the kids how to make dots for each number. For example, if the problem is 1+2 the child would write one dot for the 1 and 2 dots for the 2.
5.) Have the kids count all of the dots together to solve the equation.

Pictures below:

Take Ten!